How to Factory Reset Your WiFi Hidden Camera (TinyCam Pro Models)
FACTORY RESET INSTRUCTIONS
Doing a factory reset is useful in case your WiFi hidden camera is acting abnormally, or if you just need to move the device to a new location.
This guide covers factory resetting WiFi hidden cameras utilizing the TinyCam Pro app (which includes the models listed below). If you camera utilizes a different app, you’ll want to view the instructions for that particular app.
This guide covers the following WiFi models:
(click on camera model to jump to instructions for that model)
HC100w Factory Reset Instructions
The first step in resetting the HC100w WiFi Pinhole Camera is to connect the device to AC power using the included USB charging cable and wall charger:
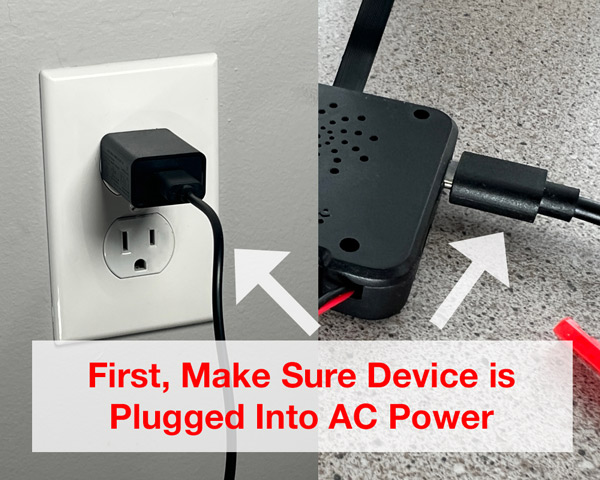
Note: You do not need to have the battery pack connected for this step since we will be using AC power to power the device for the reset process.
Once you’ve got the device connected to AC power, the device should power on automatically, and the LEDs should start to light up green as well. If not, press the power button (the button next to the red/black wires) once to turn on the camera:
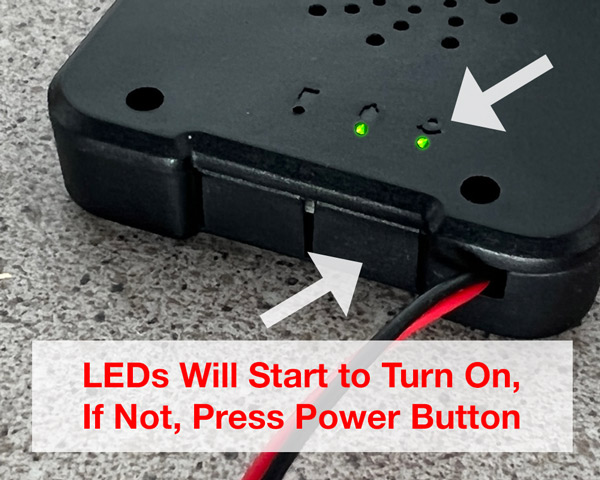
After the device turns on, wait about 2-3 minutes for the device to fully boot up.
Once it’s booted up, locate the reset button (next to the power button), and press and hold for approximately 10 seconds, and release:
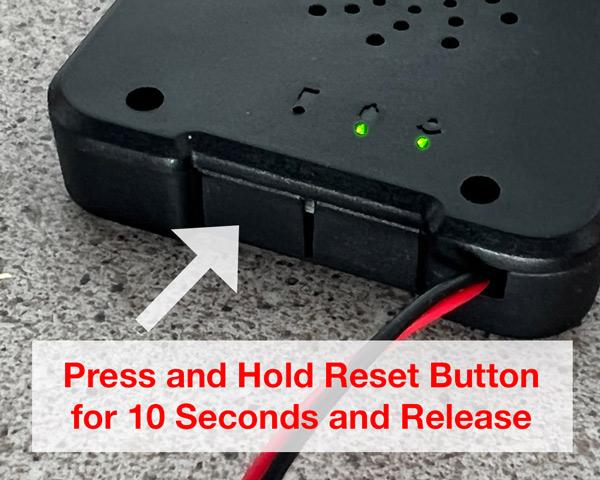
The LEDs on the device should turn off, and then start to come back on.
Give the device 2-3 minutes to boot back up again, and once a few minutes elapses, the device will be fully reset back to the factory defaults.
That’s it – you should see the AIS_###### WiFi network broadcasting again, and you can set the device up from the beginning.
HC100w Additional Resources: User Manual | Quick Start Guide | Product Page
HC215w Factory Reset Instructions
The first step in resetting the HC215w WiFi Mini Clock is to remove the back cover from the clock, by gently pressing and sliding down the back cover:
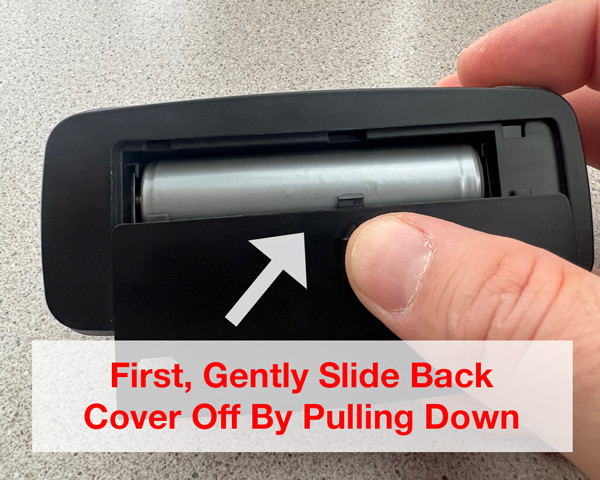
Once the back cover is off, connect the clock to AC power using the included USB charging cable and wall charger:
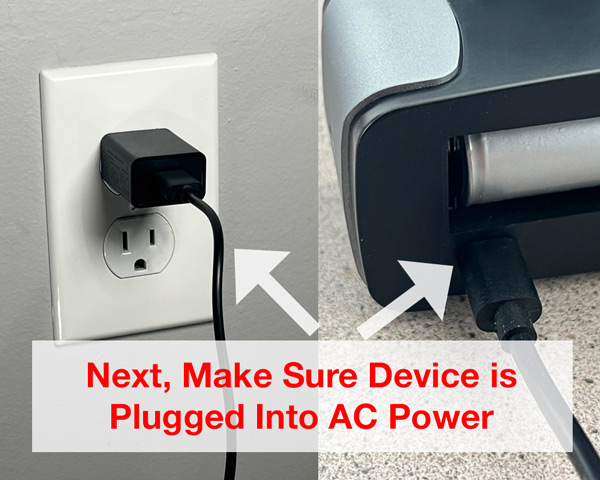
Once you’ve got the clock connected to AC power, the device should power on automatically, and the LEDs should start to turn on as well. If not, press the power button once to turn on the camera:
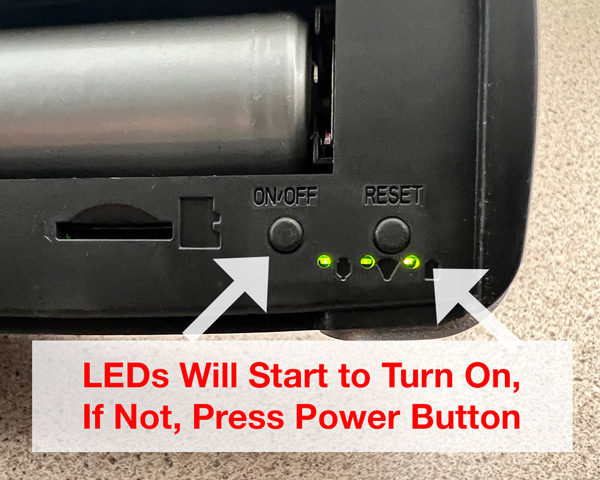
After the device turns on, give wait about 2-3 minutes for the device to fully boot up.
Once it’s booted up after a few minutes, locate the reset button (near the micro SD card slot), and press and hold for approximately 10 seconds, and release:
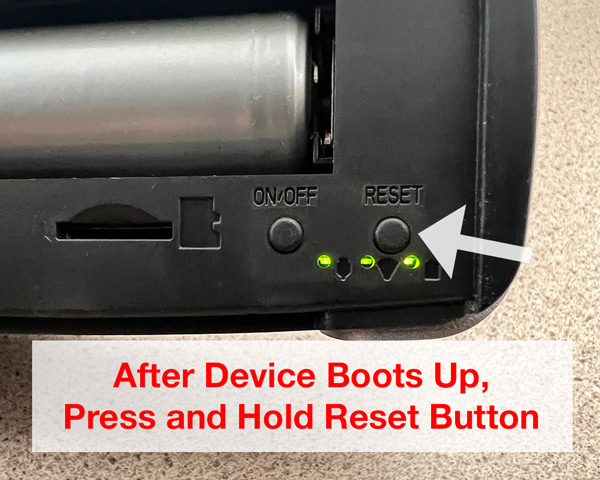
The LEDs on the device should turn off, and then start to come back on. You may also hear a chime from the clock’s speaker as the camera reboots.
Give the device 2-3 minutes to boot back up again, and once a few minutes elapses, the device will be fully reset back to the factory defaults.
HC215w Additional Resources: User Manual | Quick Start Guide | Product Page
HC350w WiFi Router Factory Reset Instructions
1. The first step in resetting the HC350w WiFi Router Hidden Camera is to connect the device to AC power using the included USB charging cable and wall charger:
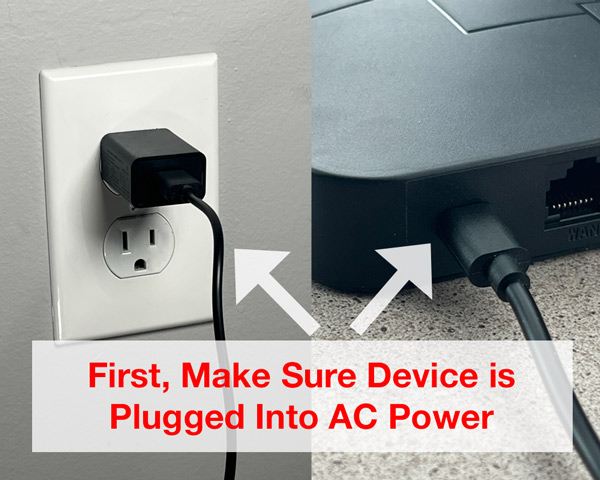
2. Once you’ve got the device connected to AC power, the device should power on automatically, and the LEDs will begin to light up as well:
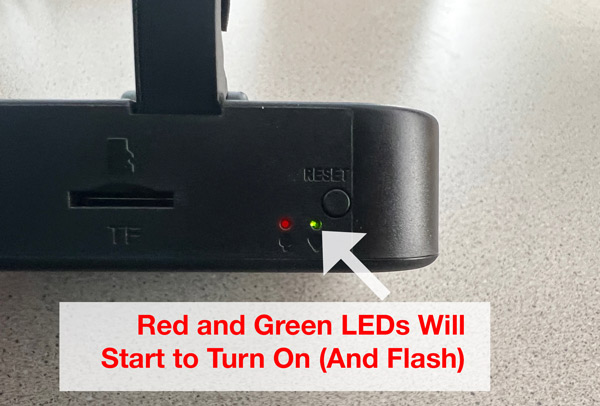
3. After the device turns on, wait about 2-3 minutes for the device to fully boot up.
4. Once it’s booted up, locate the reset button (on the far right of the back of the router), and press and hold for approximately 10 seconds, and release:
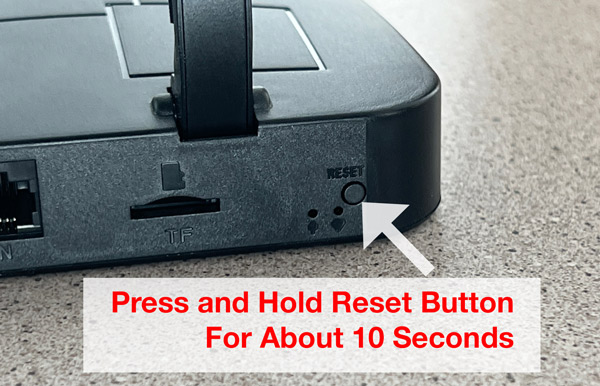
The LEDs on the device should then turn off, then release the button, and the LEDs will start to come back on as the device reboots.
5. Give the device 2-3 minutes to boot back up again, and once a few minutes elapses, the device will be fully reset back to the factory defaults.
6. That’s it! The device is now reset and ready to be set up again.
HC350w Additional Resources: User Manual | Quick Start Guide | Product Page
HC360w Factory Reset Instructions
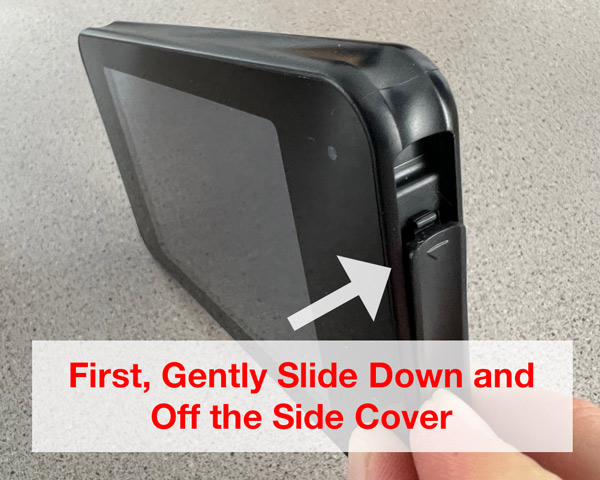
The first step in resetting the HC360w Weather Station Hidden Camera is to slide off the side cover by gently sliding it down:
Next, connect the weather station to AC power using the included USB charging cable and wall charger:
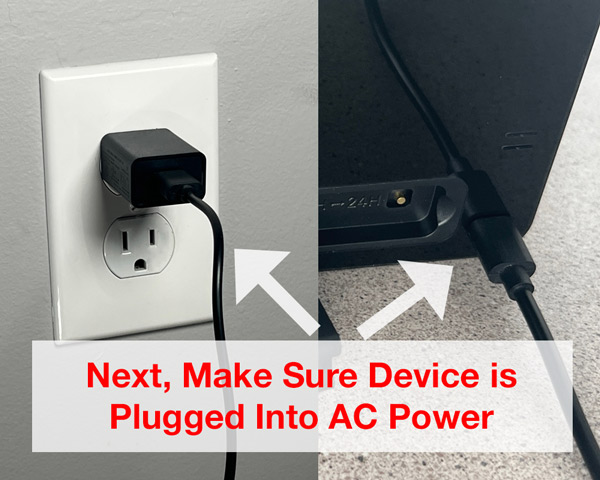
Once you’ve got the device connected to AC power, the device should power on automatically, and the LEDs on the back should start to turn on as well. If not, press the power button once to turn on the camera. The LEDs on the back of the device will begin to light up:
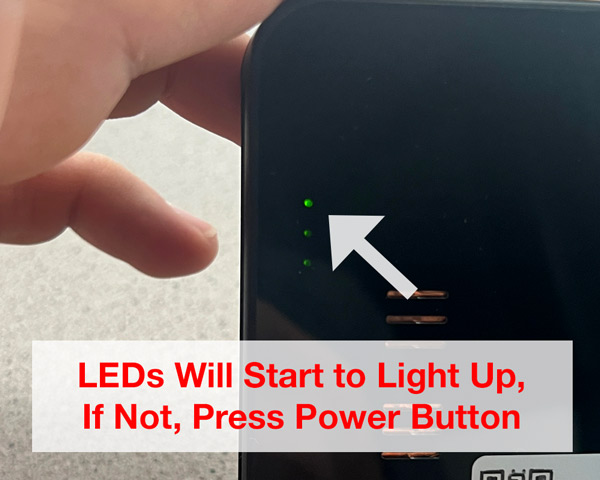
After the device turns on, give wait about 2-3 minutes for the device to fully boot up.
Once it’s booted up, locate the reset button (under the side cover with the letter “R” above it), and press and hold for approximately 10 seconds, and release:
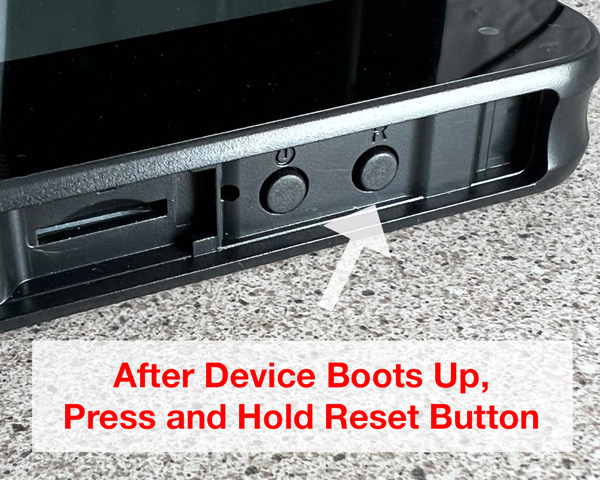
The LEDs on the device should turn off, and then start to come back on.
Give the device 2-3 minutes to boot back up again, and once a few minutes elapses, the device will be fully reset back to the factory defaults.
HC360w Additional Resources: User Manual | Quick Start Guide | Product Page
HC365w Factory Reset Instructions
The first step in resetting the HC365w USB Charger Hidden Camera is to plug the device into any standard AC wall outlet (or extension cord or surge protector):
[IMAGE OF DEVICE CONNECTED TO AC POWER]
Once you’ve got the device plugged into AC power, the device should power on automatically, and the LEDs will start to turn on as well:
[IMAGE OF POWER BUTTON CLOSEUP]
After the device turns on, give wait about 2-3 minutes for the device to fully boot up.
Once it’s booted up, locate the reset button, and using the included reset key (or small item like a paper clip) press and hold in for approximately 10 seconds, and release:
[IMAGE OF RESET BUTTON]
The LEDs on the device should turn off, and then start to come back on.
Give the device 2-3 minutes to boot back up again, and once a few minutes elapses, the device will be fully reset back to the factory defaults.
HC360w Additional Resources: User Manual | Quick Start Guide | Product Page

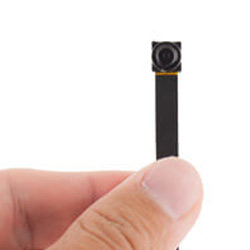 HC100w Pinhole Camera
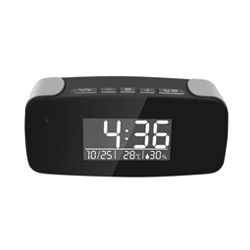 HC215w Mini Clock Camera
 HC350w Router Camera
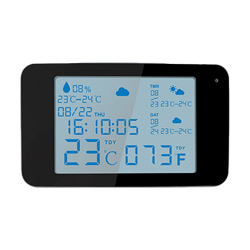 HC360w Weather Station Camera
 HC365w Wall Charger Camera